
Step 1
Go to Visitors, then Pre-Registration in the left navigation to open the Pre-Registrations page, which has three tabs across the top: Send Invite, Pre-Registrations, and Links. Send Invite requires an email or phone number for each person, supports a bulk upload so you can invite many visitors at once, and sends an automatic reminder before their arrival. Create Link builds a reusable link that needs no contact information, which you manage on the Links tab.
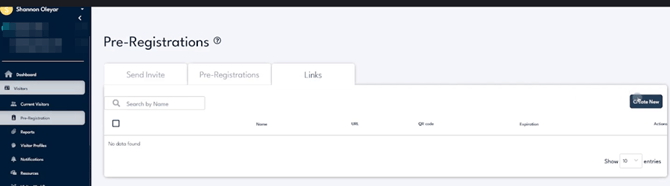
Open Pre-Registration from the left navigation; the Send Invite and Links tabs are the two ways to pre-register a visitor.
Step 2
On the Links tab, select Create New to open Create Link, give the link a Link Name, choose a Visitor Workflow if you want everyone to follow the same visitor type, and set an optional Expiration Date. Create Link needs no contact information, so anyone who opens or scans it can pre-register themselves. Leave the Visitor Workflow as Any to let the visitor choose their own reason for visiting, and leave the Expiration Date blank to keep the link permanent.
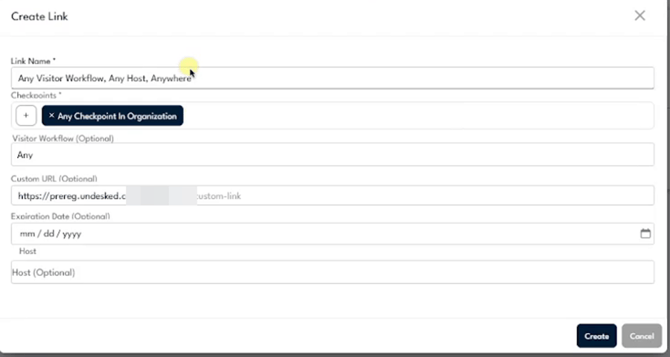
Name the link, then set its Visitor Workflow, optional Custom URL, and optional Expiration Date.
Step 3
Under Checkpoints, select the plus button to open CheckPoint Selection, then choose the CheckPoint the link is for, or leave Any Checkpoint In Organization so it works at every door. The CheckPoint controls which door the pre-registration is tied to, so visitors who use the link check in at the right entrance with the workflow you assigned.
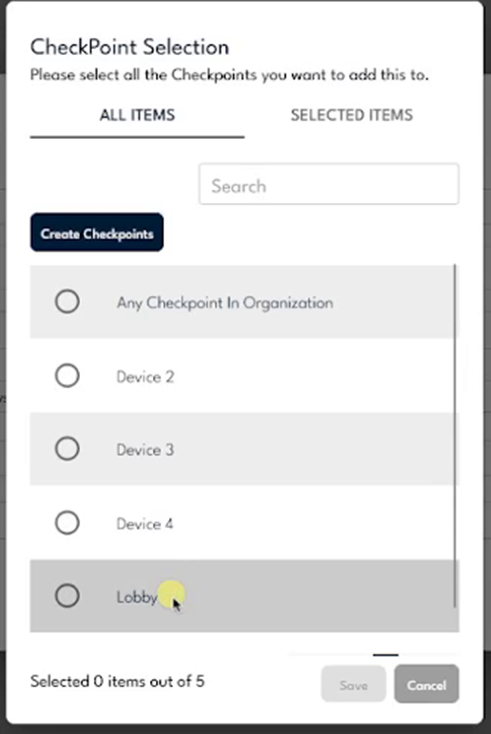
Pick one or more CheckPoints for the link, or keep Any Checkpoint In Organization, then Save.
Step 4
Select Create to save the link. It appears on the Links tab with its URL and Expiration, and you select Generate in the QR code column to produce a QR code you can print and post. Post the printed QR code where visitors arrive. Anyone who scans it opens the pre-registration form for that CheckPoint, and the link stays valid until its Expiration Date, or permanently if you left the date blank.
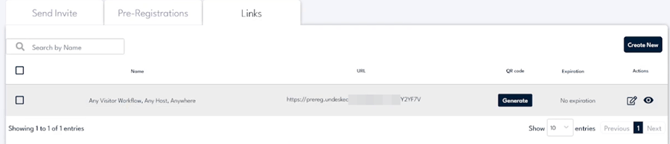
The saved link shows its URL and Expiration; use Generate in the QR code column to create a printable QR code.
Step 5
When a pre-registered visitor arrives, they tap Pre-Registered on the kiosk, enter the phone number they registered with, and their badge prints. Because the visitor already completed their details, they skip any steps they finished ahead of time. An administrator can also batch check-in everyone on a single link at once so all of their badges print together.
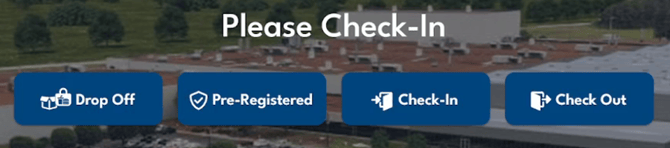
At the kiosk the visitor taps Pre-Registered rather than Check-In to finish a pre-registration.