
Step 1
Open Resources, find the green Forms section, and click Add New. In the Summary panel give the form a Name, leave Type set to Form, and set the Re-Serve Period and Mode if you need them. Then click Add PDF to attach the onboarding document the form is built on. Uploaded PDFs stay in your shared media library, so the same document can be reused across many forms.
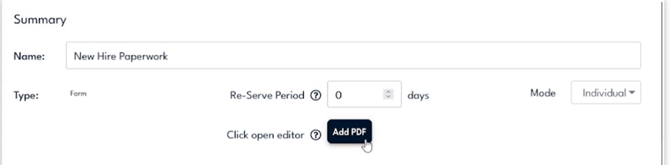
Name the form, keep Type set to Form, then click Add PDF to attach your onboarding document.
Step 2
Click open editor to reach the Drag & Drop Items screen, where your PDF appears with a field panel on the left. Click Auto-detect Fields and confirm the prompt. The AI reads the whole document, names each field from the labels printed around the blanks, and adds them to the form for you. This is the fastest way to start on a dense onboarding sheet, so let it run and then review what it created.
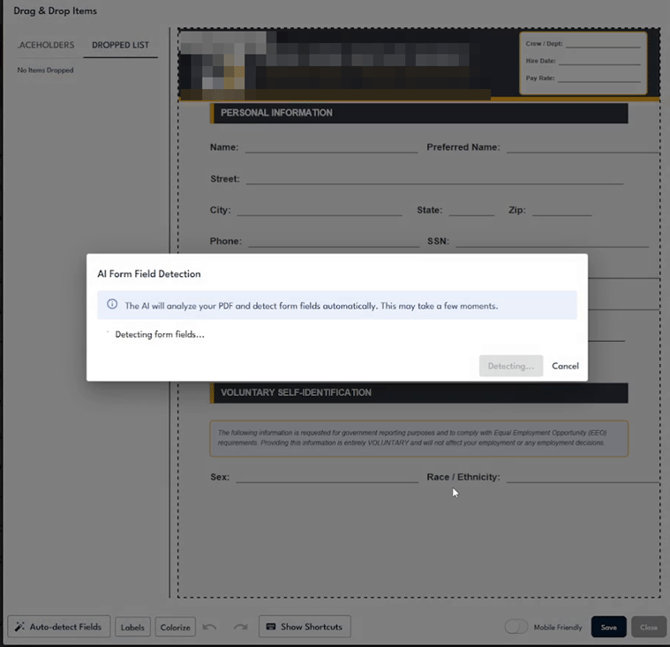
Auto-detect Fields runs the AI over your PDF and maps the blanks automatically. Review the result afterward.
Step 3
When detection finishes, every field it found is listed in the Dropped List on the left and placed on the PDF on the right. A rich onboarding form pulls in many field types at once, here covering Name, Preferred Name, Street, City, State, Zip, Phone, SSN, Driver's License, Date of Birth, Shirt Size, Email, the CDL license checkboxes, and the Sex and Race or Ethnicity dropdowns. Check each mapped field against the printed form and correct anything the AI misread before you move on.
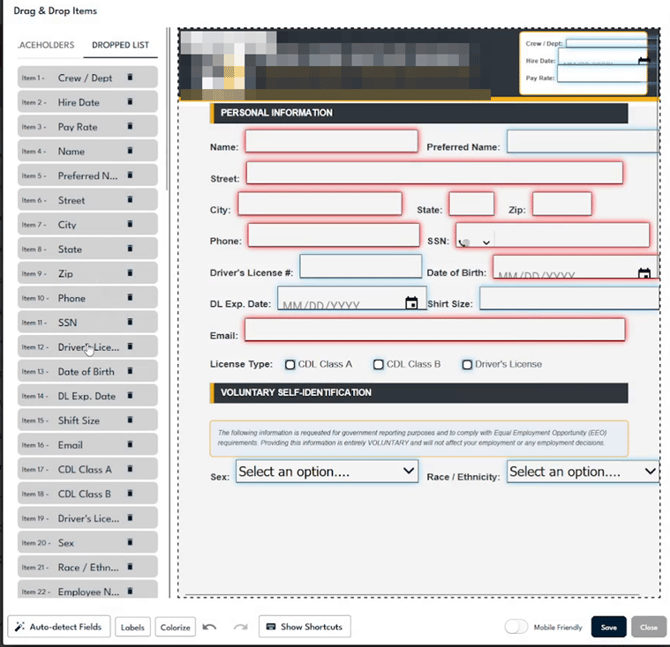
The Dropped List shows every detected field, and the form fills with text boxes, date pickers, checkboxes, and dropdowns.
Step 4
Open the Placeholders tab to add fields by hand or replace ones the AI missed. The panel is grouped into four categories: Common, Location, User Placeholders, and Custom Placeholders. Common keeps your most-used fields within reach, Location holds site and address details, User Placeholders pulls from the person's profile, and Custom Placeholders holds the fields people fill in themselves. Expand a category and drag any field onto the PDF.
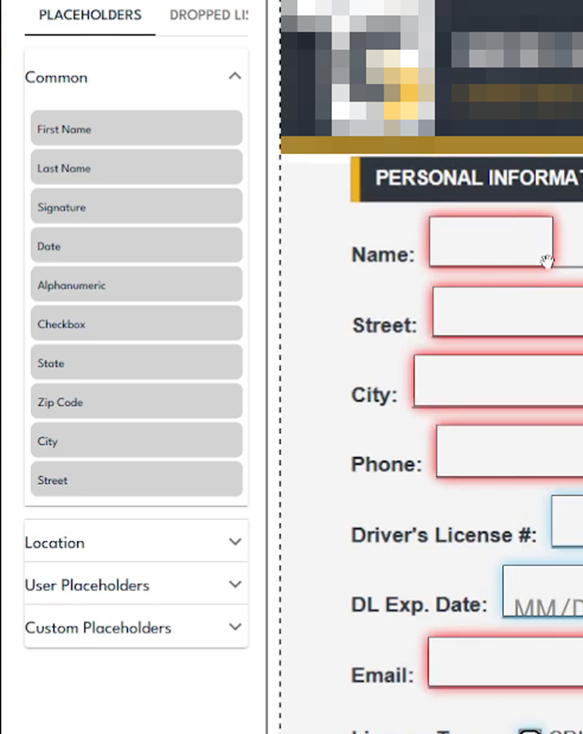
The placeholder panel groups fields into Common, Location, User Placeholders, and Custom Placeholders.
Step 5
User Placeholders is the broadest set, and every field in it fills in automatically from the person's profile. It covers First Name, Middle Name, Last Name, Cell Number, Work Email, Work Phone, Job Title, Start Date, and Shirt Size, along with Birthday, Citizenship, Communication Methods, Default Language, Ethnicity, Gender, Marital Status, Work Shift, the clothing sizes, and the Callout fields. Drop one of these over the matching blank and the new hire never has to type it, which is what makes a long onboarding form fast to complete.
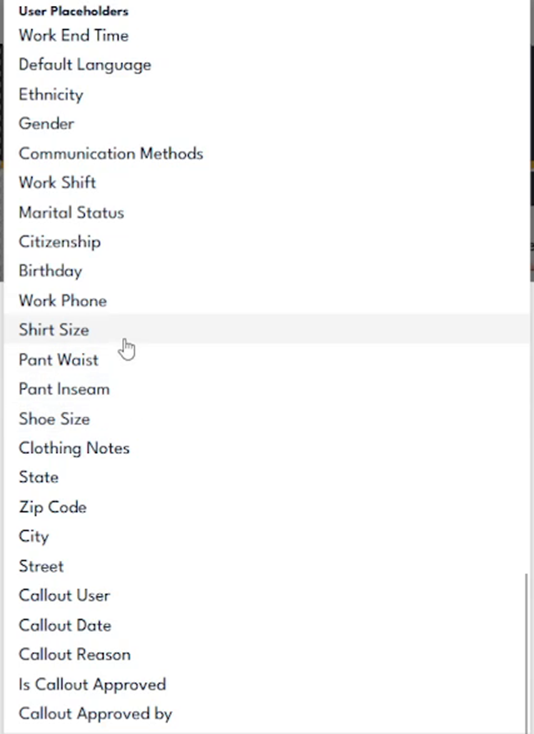
User Placeholders fill in automatically from the profile, so common details are never re-typed.
Step 6
Custom Placeholders are for anything the person types, selects, or signs on the form. The list includes Alphanumeric, Checkbox, Numeric, Phone Number, Date, Expiry Date, Attach File, Time, Dropdown, Photo, Signature, and User Selector. On an onboarding sheet you might drop a Checkbox for each acknowledgment, a Date for the start date, and a Signature at the bottom. Drag the type you need onto the PDF and position it over the matching blank.
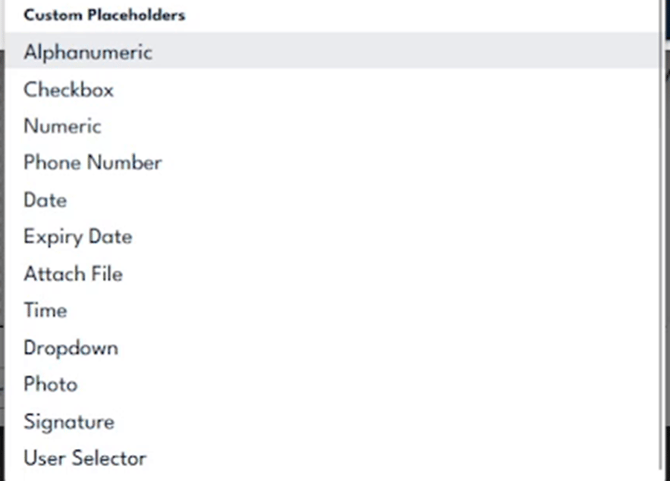
Custom Placeholders hold the fields people complete themselves, from Checkbox and Date to Signature.
Step 7
Click any placed field to open Edit Item. Set its Type, give it a clear Item Title, and mark it Required or Optional.Approver Only holds the field for the approval step. Name every field carefully, because the Item Title becomes the column header in your reports and drives any custom triggers built on the answer.
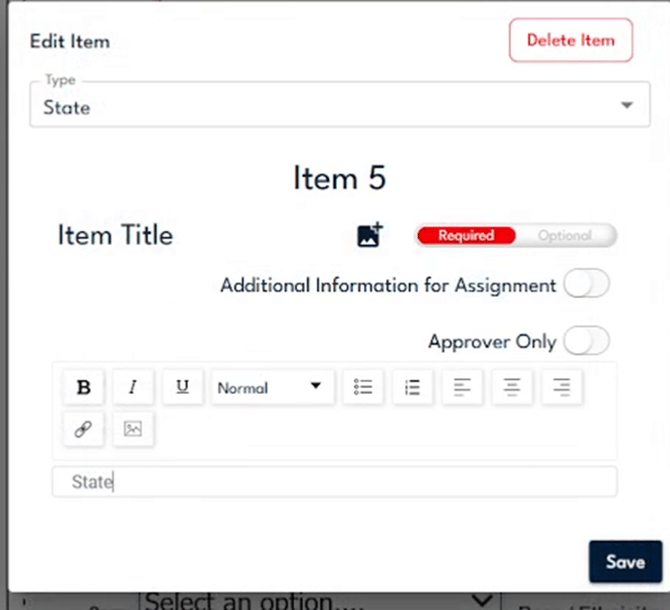
Edit Item sets the Type, Item Title, Required or Optional, Additional Information, and Approver Only for each field.
Step 8
Save your work to return to the Summary, which lists every field you mapped in the Recap and gives you three ways to distribute the form. Add to Workflow(s) attaches it to an assignment flow, Add to CheckPoint(s) places it at a check-in point, and Send Now pushes it out right away. The Recap is also where you can flip Required, Approver Only, and Additional Info for the whole form at a glance.
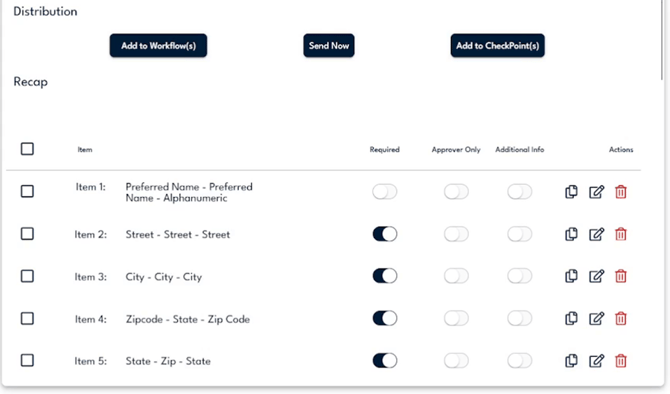
The Summary distributes the finished form with Add to Workflow(s), Add to CheckPoint(s), and Send Now.