
Step 1
Go to "Users" in the left navigation, then select "Hubs". This opens a list of all of your active hubs, with columns for the hub name, notification groups, workflows, and the actions you can take on each one.
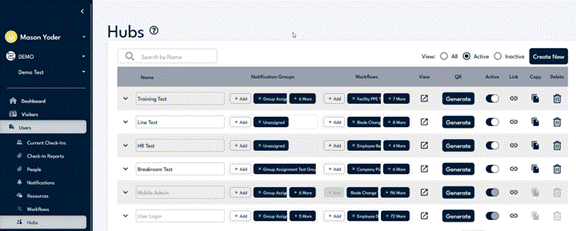
Hubs live under the "Users" menu in the left navigation; the list shows every active hub and its action columns.
Step 2
To start a new hub, click the "Create New" button in the top right. In the "Create Hubs" window, type whatever name you would like in the "Name" field, then click "Create". Once created, the hub populates your list of active hubs.
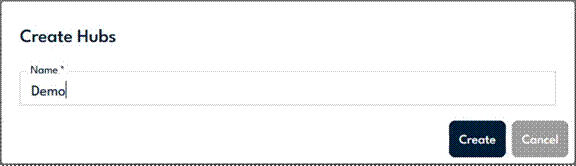
Type the hub name in the "Name" field, then click "Create"; this name is what appears on the kiosk.
Step 3
Add the workflows you want this hub to present. In the "Workflows" column for your hub, click the "Add" button. In the "Workflow Selection" window, search for and select all the workflows you want to include, then click "Save".
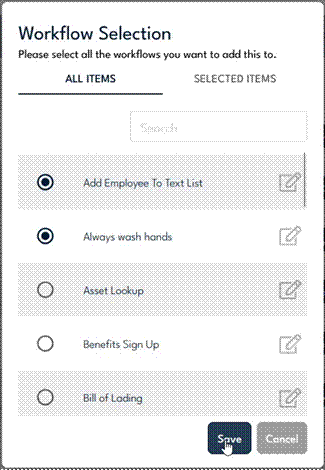
Select each workflow you want in the hub, then click "Save"; a workflow can belong to more than one hub.
Step 4
Preview the hub, generate a QR code, and use the Link and Copy options. Click the button in the "View" column to preview the hub as the end user will see it. Click "Generate" in the "QR" column to create a QR code that links to the hub, which you can print and post around your location for users to scan with their phones. Use the "Link" button to copy a hyperlink to your clipboard to send out, and the "Copy" button to duplicate the entire hub, including its workflows, notification groups, resources, and settings.
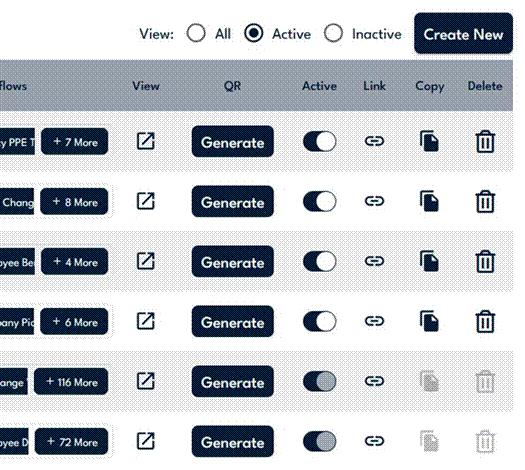
The action columns on the right hold View, QR "Generate", Link, and Copy for each hub.
Step 5
Mark the hub active or inactive. Use the toggle in the "Active" column to turn the hub on or off. Inactivating a hub is a good way to remove it from your main list and declutter without deleting it.
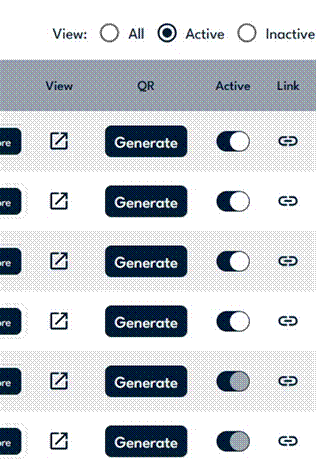
The "Active" column toggle turns a hub on or off without deleting it; switch the top "View" filter to "Inactive" to find a hidden hub.
Step 6
Open the hub's Settings and Theme panels. Click the arrow next to the hub name to expand two drop-down panels: "Settings" and "Theme". In "Settings" you can adjust options such as tags, auto check-out timing, requiring a check-in photo, the default language, the static QR code, and which on-screen features are enabled, to get the hub working exactly how you want it. In "Theme" you have tabs for "Background", "Logo", "Colors", "Text", and "Screensaver", with a live preview that shows how the kiosk will look as you make changes.
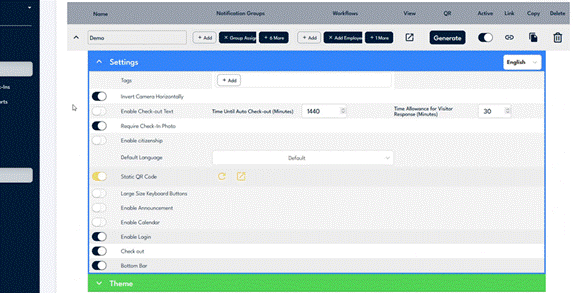
Expanding the hub reveals the blue "Settings" panel and the green "Theme" panel; Settings controls behavior and Theme controls appearance.