
Step 1: Upload and Organize Content in the Resource Library
Navigate to the Digital Signage section and open the Resource Library.
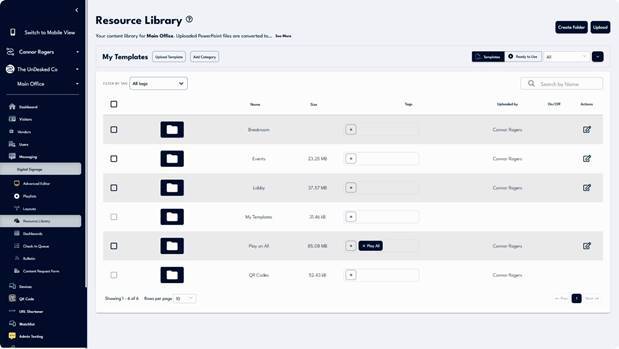
In the Resource Library, click the Upload button to add new media files to your library.
You can create folders to better organize your digital signage content (for example, by department, content type, or user).
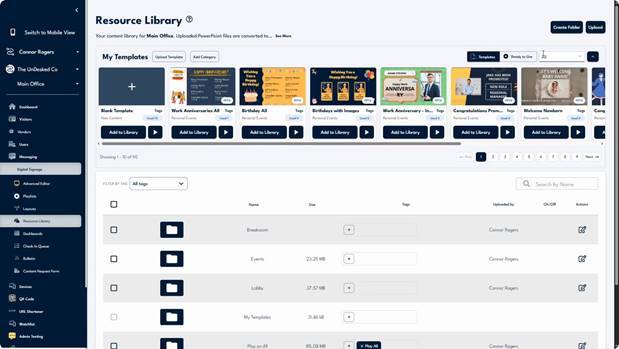
UnDesked also offers templates and ready-to-use content that you can add to your library. Open the dropdown menu to view and select from these options.
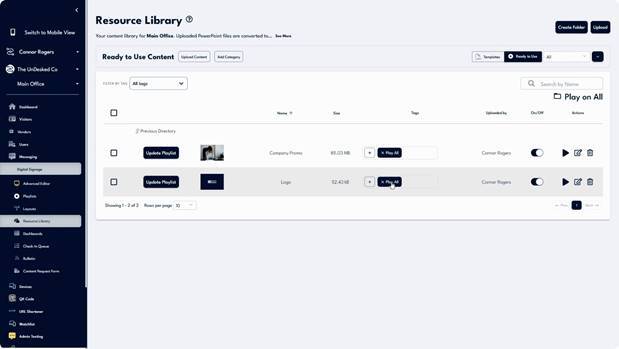
To add tags to your content, click the plus (+) icon and either create a new tag or assign existing tags to the selected item.
If you assign a tag to a folder, that tag will automatically apply to all existing items in the folder as well as any new items added later.
Step 2: Create and Configure Playlists
Open the Playlist tab to create and manage playlists that will control the order and timing of your content.
In the Playlist tab, you can view all playlists for your location. Click Create Playlist to add a new one.
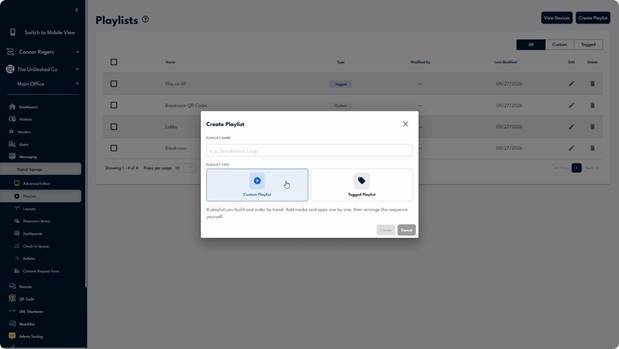
You can choose between:
- Custom Playlist – total control over each piece of content in the playlist.
- Tagged Playlist – content is automatically pulled in based on tags and conditions you define.
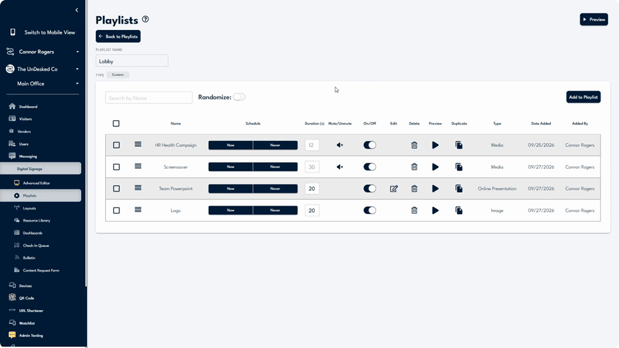
When working with a custom playlist, you can:
- Reorganize items.
- Add start and end dates to each item.
- Adjust the duration for images or PowerPoint files.
- Mute audio on video content.
- Edit PowerPoint files.
- Delete items from the playlist.
- Preview individual items.
- Duplicate items within the playlist.
You can also see each item’s file type, who added it, and when it was added. To preview the entire playlist, click the Preview button at the top-right of the screen.
To add content to a playlist, click Add to Playlist. A pop-up window will display your Resource Library.
Use the folder structure to navigate to the item you want to add, then click Update Playlist to confirm.
For a Tagged Playlist, the playlist automatically pulls in content based on the tags and conditions you set.
You can:
- Include or exclude media with specific tags.
- Use both include and exclude conditions simultaneously.
- Specify whether content must match any or all of the selected tags (for both include and exclude conditions).
Click Add Tag for the selected condition to configure tags.
In the tag selector, you can create new tags or select from existing ones.
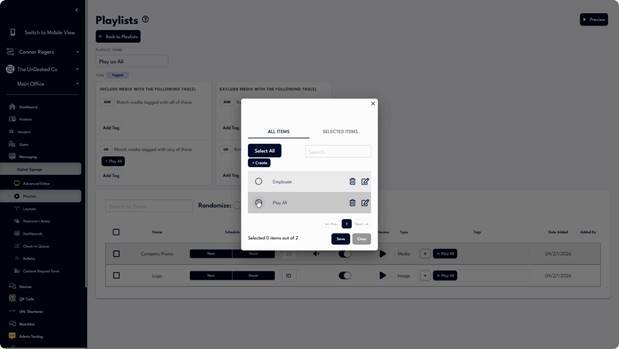
Once configured, the playlist will populate automatically based on the applied tags and conditions, removing the need to manually manage the playlist content.
Step 3: Configure Layouts and Assign Playlists
Now that you have content and playlists ready, open the Layout tab to view and manage your layouts.
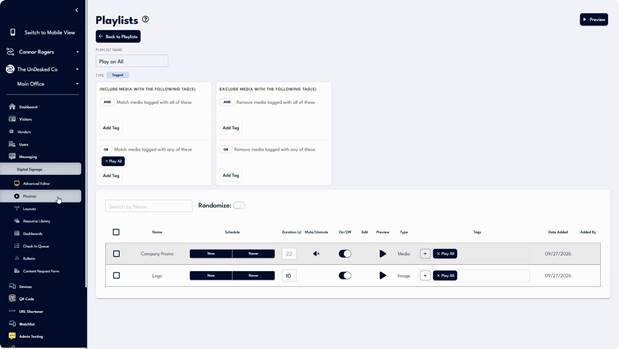
Layouts are what you see on the displays and can contain playlists and various widgets. For example, a full-screen layout may have a single placeholder that contains a single custom playlist.
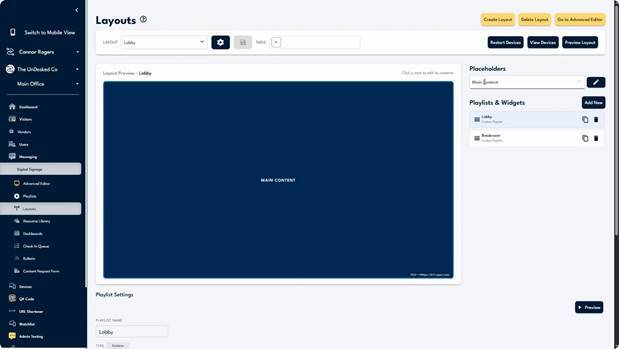
You can scroll down to preview or add content to the associated playlist.
Layouts can also be more complex and include multiple placeholders. For example, a break room layout might show videos in the main panel with a QR code, weather, time and date, and a bulletin scroller around it.
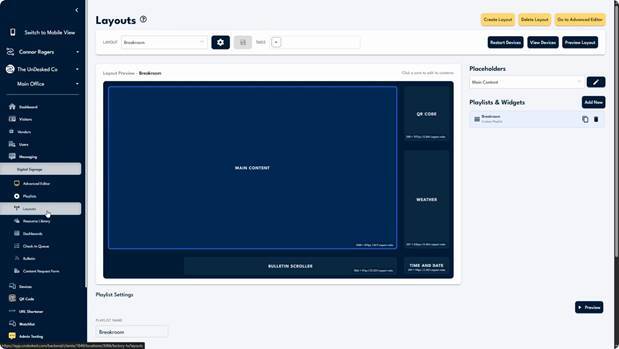
To edit the content for each placeholder, select the placeholder either by clicking it directly in the layout preview or by choosing it from the Placeholders dropdown.
With a placeholder selected, click Add New to add playlists and widgets to that area.
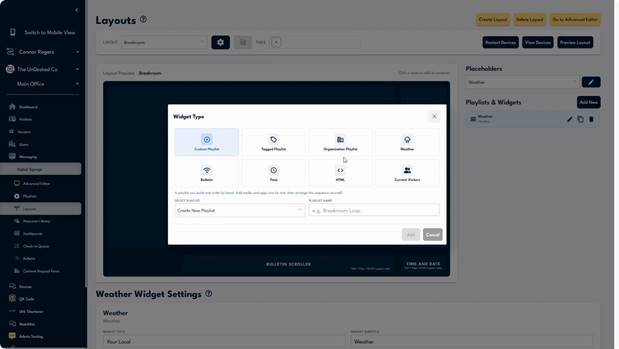
You will then see a set of options, such as:
- Embedding content via HTML code.
- Displaying a list of current visitors in your facility (if you are also using the visitor management system).
The messaging and notification system can also integrate with your layouts. In the settings next to the Layout dropdown you can configure how notifications appear on your displays and how long they remain visible.
Step 4: Assign Layouts or Playlists to Devices
Once layouts are configured, assign them (or specific playlists) to devices so your content appears on the appropriate screens.
The last step is to assign the content you have uploaded, added to playlists, or configured in layouts to a device.
Go to the Device section in the navigation bar and select a device.
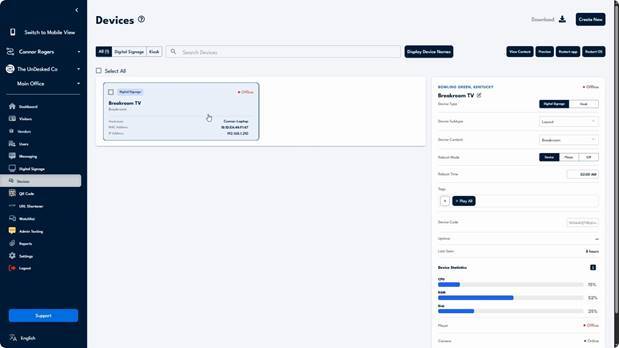
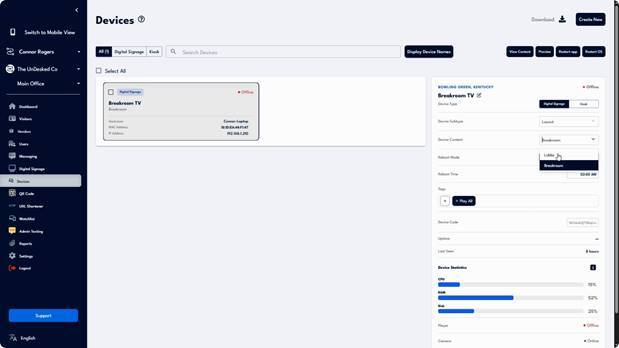
Within the selected device, click on Digital Signage, then choose a device subtype as appropriate.
You can then assign either a layout or a playlist directly to the device. After making your selections, click Save to apply the changes.
Step 5: Use Device-Level Tags and Content Overrides
Enhance automation and flexibility by tagging devices and managing device-specific content.
You can add tags directly to a device.
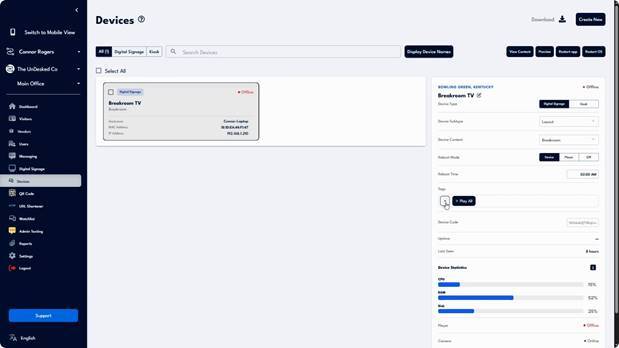
When a device has tags, any content in your resource library that shares those tags is automatically added to a unique playlist that exists only on that device.
This enables direct and instant assignment of new tagged content to the device without manually editing playlists or device assignments.
To view and manage device-level content, select a device and click View Content.
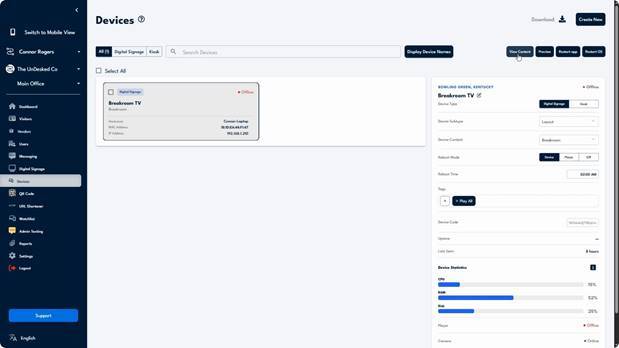
This view shows the content currently playing on that specific device.
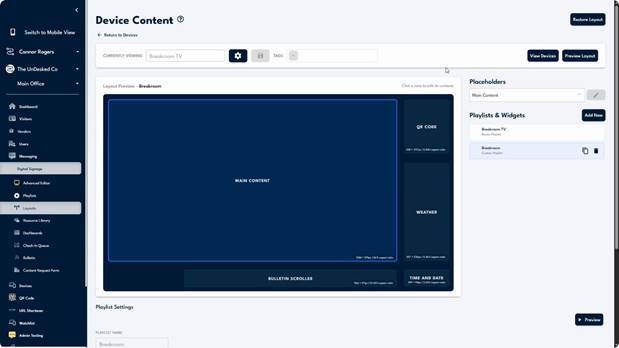
From here, you can add content on top of the assigned layout that is unique to the device itself. These additions affect only the device and are not added to the layout definition.
Keep in mind that any changes made in the device-level content view do not modify the layout. To make permanent layout changes that affect all devices using that layout, you must edit the layout from the Layout page.
This completes the general overview of the UnDesked signage environment.
If you have additional questions, contact support by clicking the support button located at the bottom-left side of the screen.