
Step 1
Open the workflow you want to automate from the Workflow page and click Assign on its row. The Assign button opens the assignment dialog, where you decide what event creates this workflow for your staff.
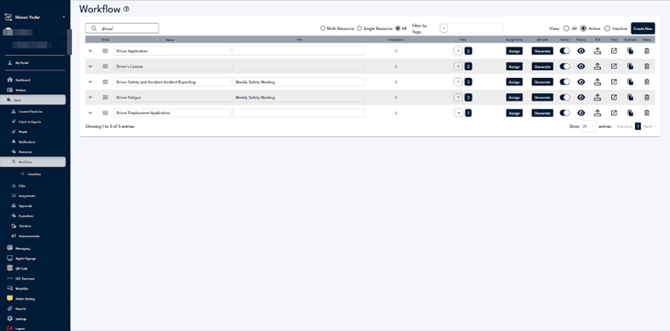
Find the workflow row, then click its Assign button on the right.
Step 2
In the assignment dialog, pick the trigger source in the Templates row. There are four: Workflow, Test Pass, Test Fail, and Custom Criteria. Each one defines the event that creates the assignment automatically.
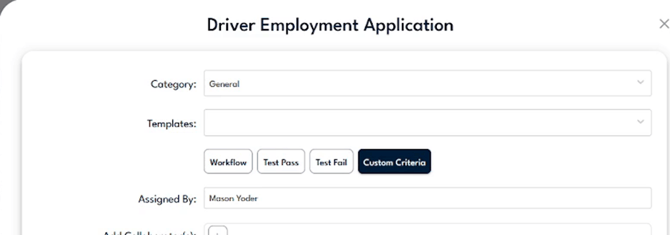
Choose the trigger source under Templates.
Step 3
Workflow, Test Pass, and Test Fail. For a Workflow trigger, use the On Completion Of picker to choose the workflow whose completion fires this one, which is how you chain one workflow into the next. Test Pass and Test Fail fire when a chosen test is passed or failed.
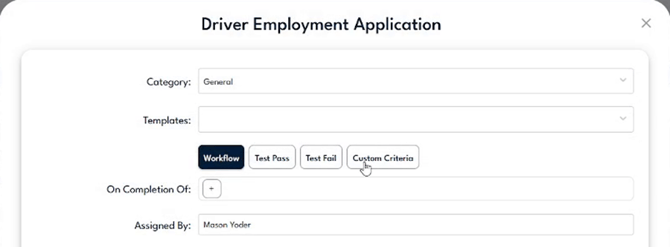
With Workflow selected, set On Completion Of to the workflow that should trigger this one.
Step 4
Custom Criteria is the most flexible trigger, so it is worth a closer look. It fires on a specific answer inside a form. Open the source form, expand the Test, Form & Acknowledgement section, and click Add Rule. Pick the form, set the condition to passed, failed, or Any, then choose the exact question and the answer value that has to match. Add more rules to require several conditions at once. For example, an incident report answered "Yes" to property damage can automatically assign a maintenance follow-up to the right team.
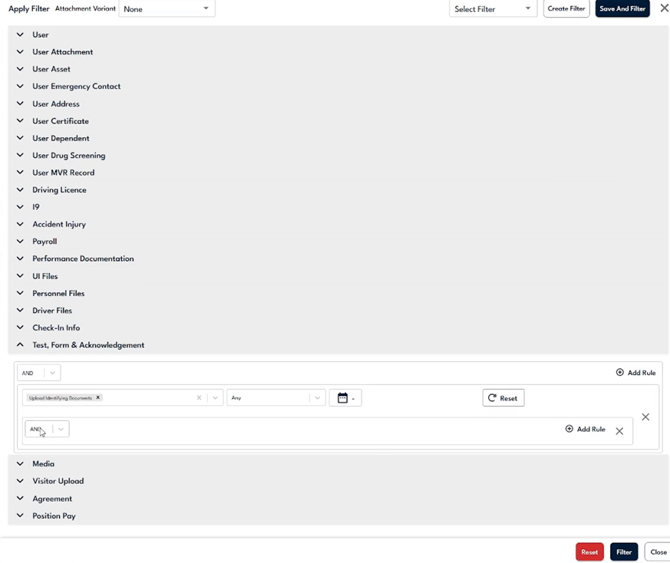
Expand the section, click Add Rule, then set the form, the question, and the answer that should fire the assignment.
Step 5
Set who receives the assignment under Assigned To: Individual Staff, a Group, or Previous Assigned To (whoever was previously assigned, such as the person who submitted the form). Then set the due date, add any Reminders, and turn on the notification channels you want.
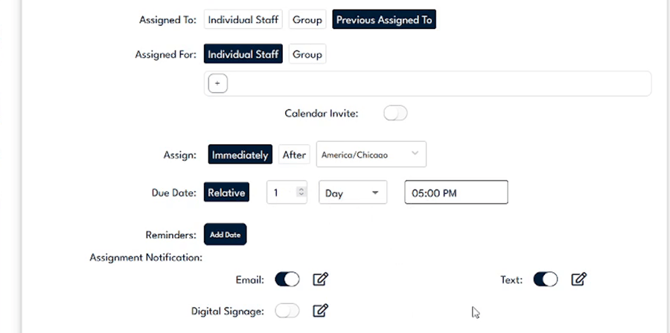
Choose the recipient under Assigned To, set the due date, and enable notification channels.
Step 6
Open the Automations page from the Assignments menu to review and edit every triggered, recurring, and scheduled assignment in one place. Each row shows the Workflow, the Trigger, who it is Assigned To, and the Due Date.

Use the gear icon to edit any automatic assignment, or the trash icon to remove it.